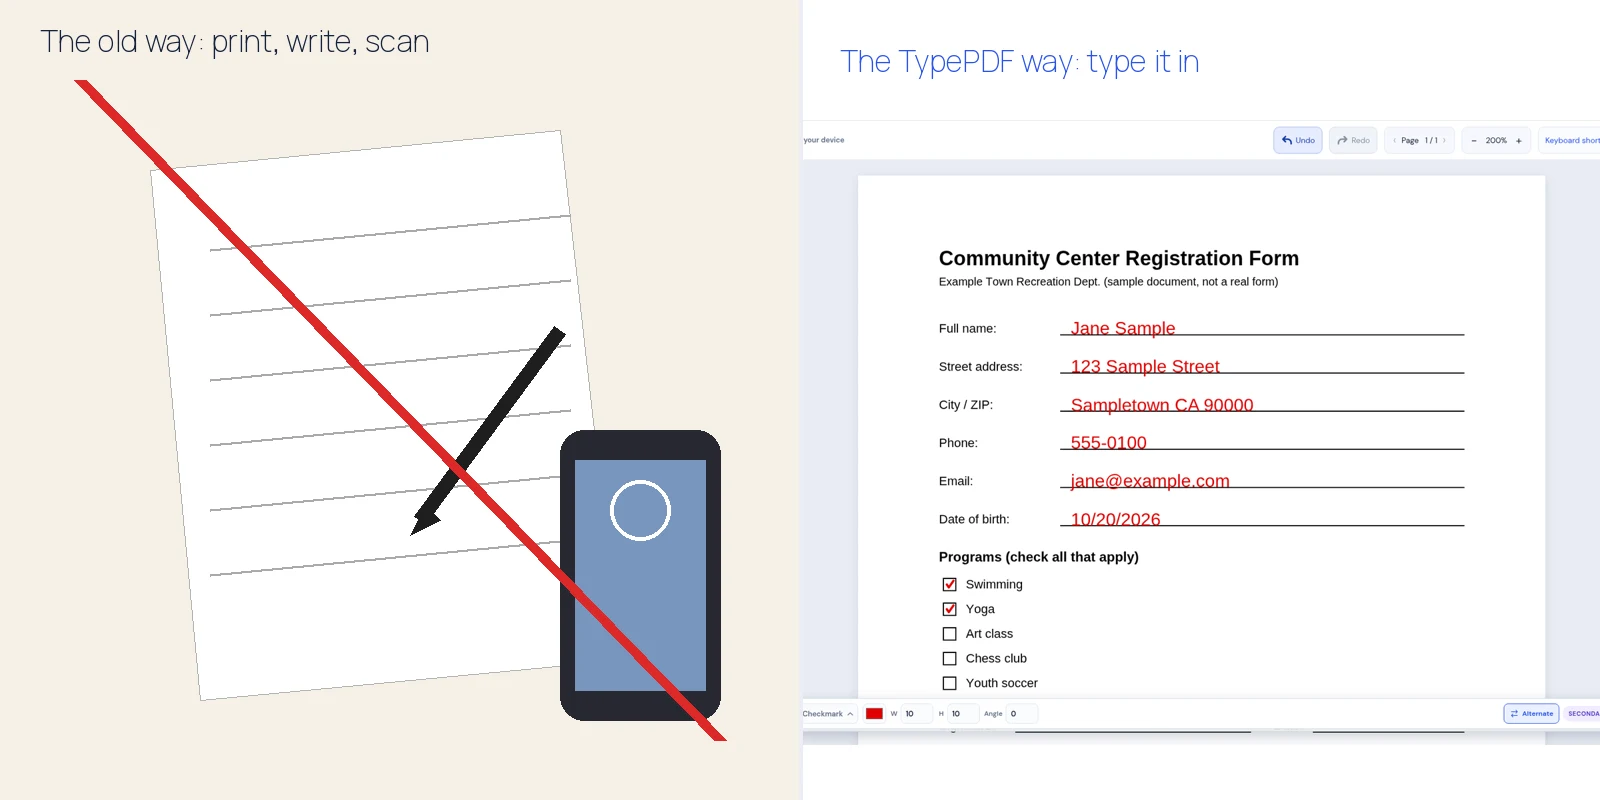
The old routine goes like this: print the form, fill it in with a pen, scan it or take a photo, turn that into a PDF, and email it back. It takes a while, it needs a printer, and the scan often comes out crooked or hard to read.
For most forms, you can skip all of that and type your answers straight onto the PDF. Here's how, on any device, plus how to handle signatures and the few cases where paper really is required.
The short version
- Save the PDF to your computer or phone (not just the email preview).
- Open it in a tool that can type on PDFs. That could be TypePDF in your browser or an app you already have.
- Type your answers into the fields, or on top of the page if it has no fields.
- Add a signature if the form needs one and the recipient accepts electronic signatures.
- Save or download the completed copy and check it.
- Send it back by email or upload.
Step 1: Save the PDF first
Email and cloud previews are usually read-only. Download the attachment or file first, and note where it went (often Downloads). Fill out a copy and keep the blank original in case you need to start over.
Step 2: Choose a tool
Any computer, in the browser: TypePDF. Open TypePDF, select Choose PDF, then click where each answer goes and type. A text box appears where you click, so you can work straight down the form. It works whether or not the form has fillable fields, and on iPhone and Android you just tap to type. There's no account, downloads have no watermark, and your file stays on your device.
Apps you may already have:
- Windows: Microsoft Edge. Click a field to type, or use Add text for forms without fields.
- Mac: Preview. Click a field, or use the Markup toolbar's Text tool.
- iPhone: the Files app or Preview. See how to fill out a PDF on iPhone.
- Chromebook: the Gallery app. See how to fill out a PDF on a Chromebook.
- Adobe Acrobat Reader (free): All tools > Fill & Sign, then Add Text.
More detail on each: how to fill out a PDF without Acrobat.
Step 3: Fill in your answers
- Fillable form: click each field and type.
- Non-fillable form or scan: add text on top of the page. In TypePDF, just click the blank and type. See how to fill out a non-fillable PDF.
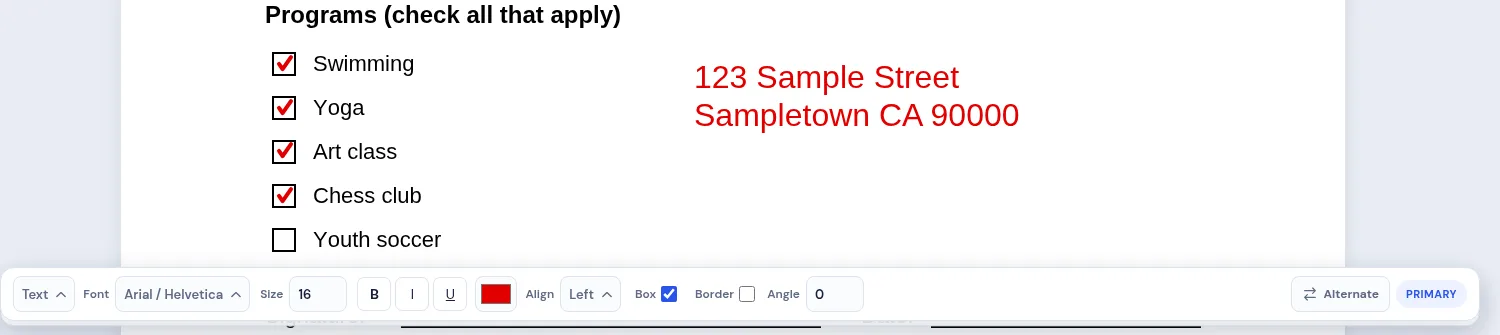
- Checkboxes: in TypePDF's bottom action bar, click Alternate and set it to Checkmark, then Alt + click (Option + click on Mac) each box. Other apps have their own checkmark or "X" tools.
- Longer answers: use a wrapping text box (in TypePDF, turn on Bound in a box) and size it to the answer space.
- Dates and formats: follow the format the form asks for, like MM/DD/YYYY.
Step 4: Signatures without printing
This is where people most often reach for the printer. You have a few options, and which one is acceptable depends on who you're sending the form to.
- Typed name. Some recipients accept your typed full name on the signature line. Many don't.
- Drawn or image signature. TypePDF, Preview (Mac), the iPhone, the Chromebook Gallery app, and Acrobat Reader all have signature tools. Steps for TypePDF are below.
- Digital (certificate-based) signature. Some organizations require a signature from a digital ID, which you'd add in a tool like Acrobat Reader.
- E-signature service. Sometimes the sender uses a signing service and emails you a link instead of a PDF.
If you're unsure, check the form's instructions or ask the sender which kind they accept.
Add a signature in TypePDF
- Open your PDF.
- In the bottom action bar, set Default action to Signature. To use Alt + click (Option + click on Mac) instead, click Alternate and set Signature on that second bar.
- In the Signatures dialog, choose Draw signature (draw, then Save) or Upload image (PNG, JPEG, or WebP).
- Click your saved signature to select it.
- Click (or Alt + click) where it goes.
Signatures are saved on this device. On a phone there's no Alt key: tap Alternate in the bottom toolbar to switch between your two actions, then tap the page.
When you might really need to print
Be honest with yourself here. Some forms do need paper:
- The instructions say to sign in ink or to send the original by mail.
- The document has to be notarized or witnessed in person, unless the notary offers a remote option that's allowed where you are.
- The form is digitally signed or certified and locked, and the sender won't provide an unsigned copy.
In those cases, typing your answers first and then printing still gives you a neater form. Just sign by hand where it's required.
Step 5: Save, check, and send
- Download or save the completed file. In TypePDF, choose Flattened PDF for the copy you send. It fixes your text and shapes onto each page so they look the same in any viewer.
- Give it a clear name, like lease-application-jamie-ortiz-completed.pdf.
- Open it once and check every page: names, dates, phone numbers, and checkboxes.
- Send the right file. Your Downloads folder may now hold two similar files. Attach the completed one.
Flattening is not a security feature. If the PDF contains sensitive information, share it only through channels the recipient trusts.
FAQ
Can I fill out a PDF without a printer or scanner?
Yes. Type directly on the PDF on your computer or phone, then save and send the completed file.
What if the PDF won't let me type?
It probably has no fields, is a scan, or is open in a preview. See why you can't type in a PDF.
Is a typed or drawn signature legally valid?
That depends on the document, the recipient, and where you live. Follow the sender's instructions, and ask if you're not sure.
Will the recipient know I didn't print it?
They'll get a PDF with typed answers instead of a scan, which is usually easier to read.
Can I sign without printing?
Often, yes. In TypePDF, set Default action (or Alternate) to Signature, draw or upload one, select it, and click where it goes. You can also use your device's signature tool. Check that the recipient accepts it.